

Hand Sanitizer Case Templates
Hand Sanitizer Case Templates
Couldn't load pickup availability
Use the DROP DOWN Menu to make your selection.
This cute little Case is the perfect size for not only Hand Sanitizers but also your ChapStick, ear buds, credit cards, cash & more! My friend, Sandra Bosworth, came up with this idea & made this cute sample to share with you - thanks, Sandra!
You've probably seen this travel size hard case style of hand sanitizer. You can find them at Target, Dollar Tree, Bath & Body Works. This case with an optional Fabric Tab + Clip is a fun way to keep them nearby!
This little project:
- is the perfect size for all those scraps!
- is beginner friendly
- whips up quickly
- requires few items & tools
- makes a great last minute gift
- is a great impulse buy if selling!
Choose from the:
- Full Template
- Half Template
- Full + Tab Template
- Half + Half Template
The Full Template is the exact size of the fabric needed.
With the Half Template, you'll fold your fabric in half & place the fold along the bottom edge of the Template then cut.
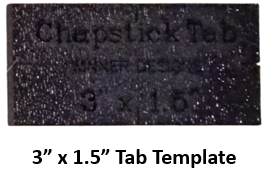
The optional Tab Template creates a Fabric Tab that will work with 1/2" or 3/4" D Rings & Clips.
The Closure can be done using Snaps, a button, Velcro or even a hair elastic with a button.
D Ring, Clip & Hand Sanitizer are not included with purchase.
No video but this is a super simple, super quick project.
Basic Directions using Snaps for Closure:
- If adding a Tab, cut one piece of fabric using Tab Template. Fold in half then fold each side in to center binding style. Press well. Edge stitch each side down. Slip into D Ring + Clip then stitch raw edges together. Put aside.
- Cut 2 pieces of fabric plus optional SF101 or Fusible Fleece using Half or Full Template. (If using Half Template, fold fabric in half first & place fold on bottom edge of template then cut.)
- Fuse either SF101 or Fusible Fleece to one rectangle.
- Place the 2 fabrics right sides together.
- Use Etch Line on template as a guide for Tab placement. (I like mine further down closer to the folded area than Sandra's example but place where you like.) On left side, pin Fabric Tab in place between the 2 layers with all raw edges lined up together & the Clip going inside.
- Using a 1/4" seam allowance, sew the 2 rectangles right sides together but leave a 2" opening for turning in the middle on the right side. For the Fabric Tab, sew several times over it to make sure it is well stitched. Be sure to backstitch at the beginning & end.
- Snip the excess fabric at the corners & turn right sides out. Push out seams. Check that the Fabric Tab has been sewn well. Line up the edges of the turning area. Press the whole project well.
- Grab your hand sanitizer. Fold the bottom up to decide on fold placement then press the fold in place with your iron. Pin or clip well. Edge stitch all along the project. Be sure when stitching the turning area that the edges are nicely tucked in. Backstitching at the beginning & end.
- Place the Hand Sanitizer inside to check for fit & placement of snaps. Determine best placement for Snaps then add the 2 Snaps in the typical fashion. New to snaps? Check out any video online.
- Now, go make another for your credit cards & cash!
The finished size when open is 3.5" W x 7" T.
Need a larger size? Just call me at 850-449-0259~